# Manage Exam Schedules
**Managing Exam Schedule**
The **Manage Exam Schedule** feature allows administrators to efficiently create, organize, and manage examination schedules for different grades and sections. This feature ensures that all subjects are assigned proper dates, total marks, and grading scales while maintaining clarity and consistency across assessments.
**Key Functions:**
* **Exam Creation:** Admins can set up exams by defining the title, academic year, grade, section, and term.
* **Subject Selection:** Assigns subjects along with exam dates and total marks.
* **Scheduling & Duration:** Allows setting start and end dates for exams to ensure smooth execution.
* **Mark Entry & Attendance Tracking:** Enables adding student scores, marking absentees, and mentioning reasons for absence.
* **Publishing & Report Generation:** Once marks are entered, results can be published and made available for report card generation.
1**. Creating an Exam Schedule**
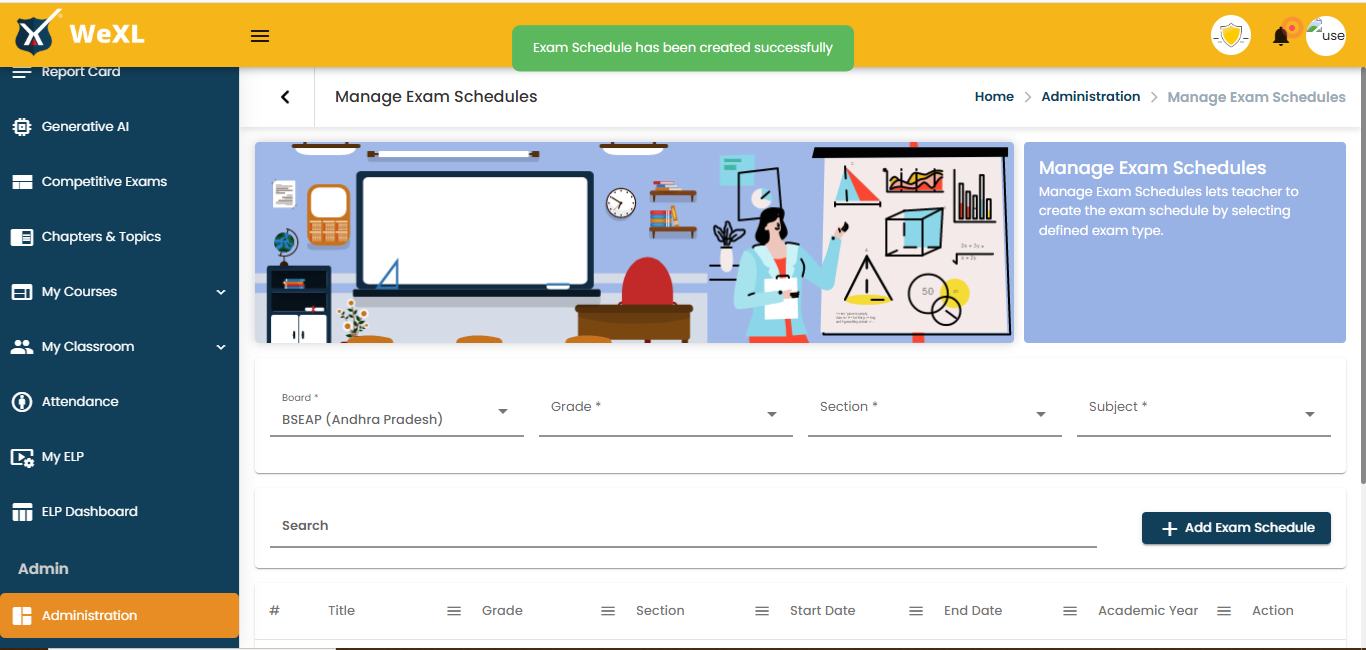
**Step 1: Navigate to Exam Scheduling**
* Go to **Manage Exam Schedules** under **Exam Management**.
* Click  to create a new exam schedule.
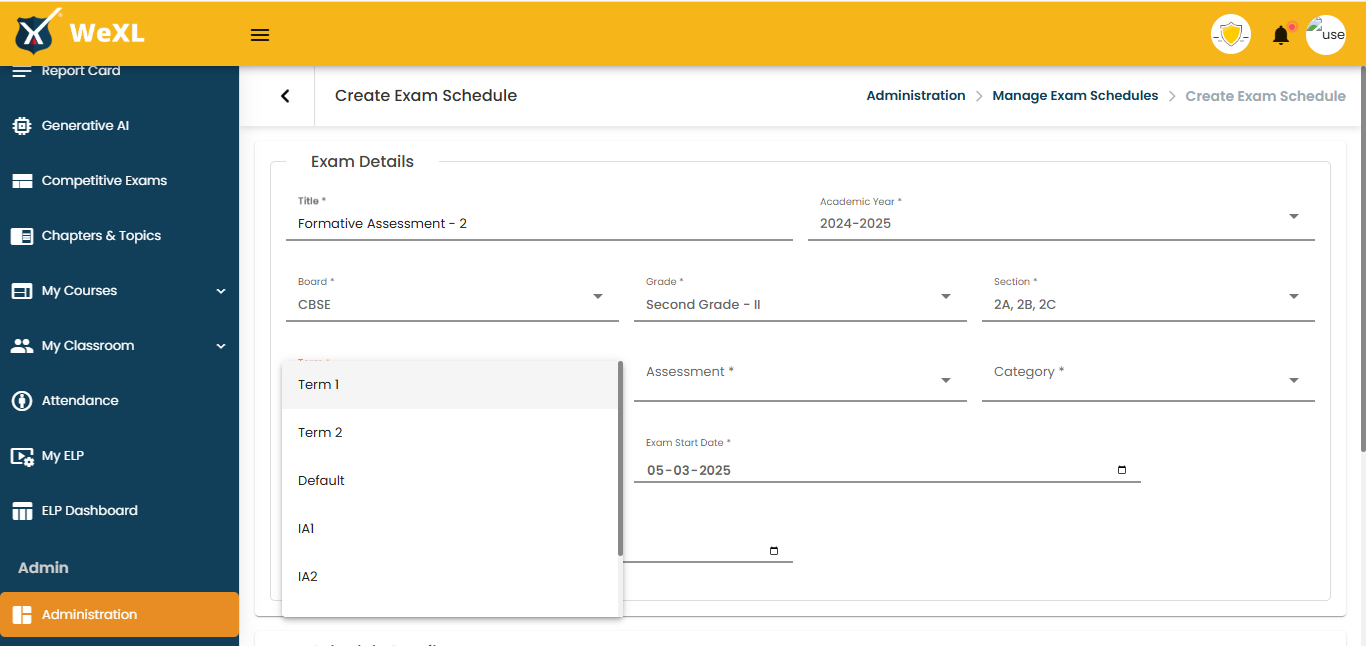
**Step 2: Configure the Exam Schedule**
* Enter the **exam title** (e.g., Formative Assessment 2).
* Select the **academic year, grade, section, and term**.
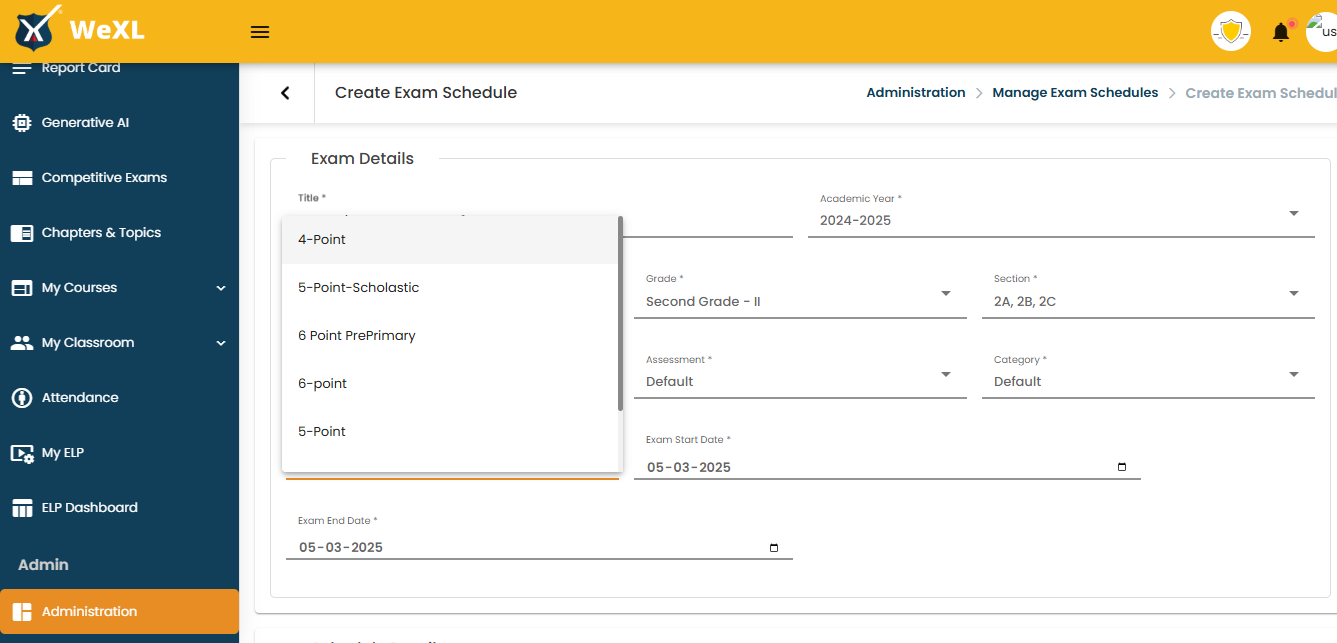
* Choose the **assessment type**.
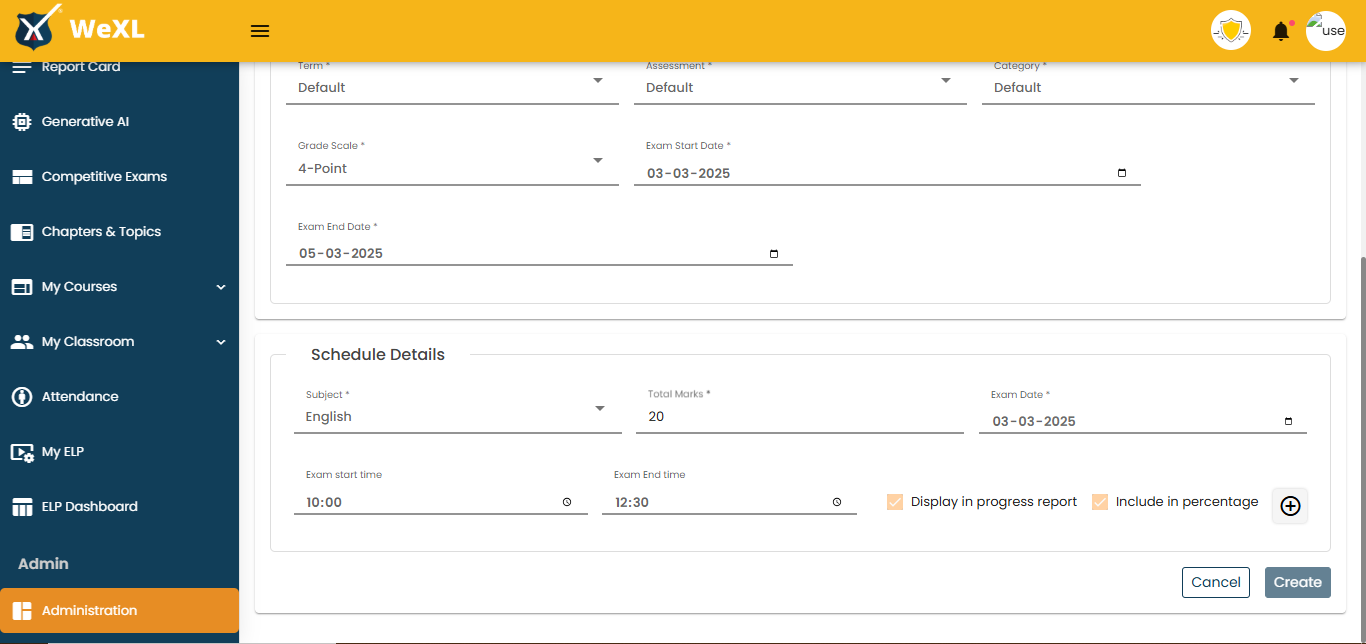
* Set the **grading scale** (e.g., 4-point scale).
* Define the **exam start and end dates**.
**Step 3: Add Subjects to the Exam**
* Select each subject and assign:
* **Total marks**
* **Exam date**
* Click **Create** to finalize the exam schedule.
***
**3. Adding and Publishing Marks**
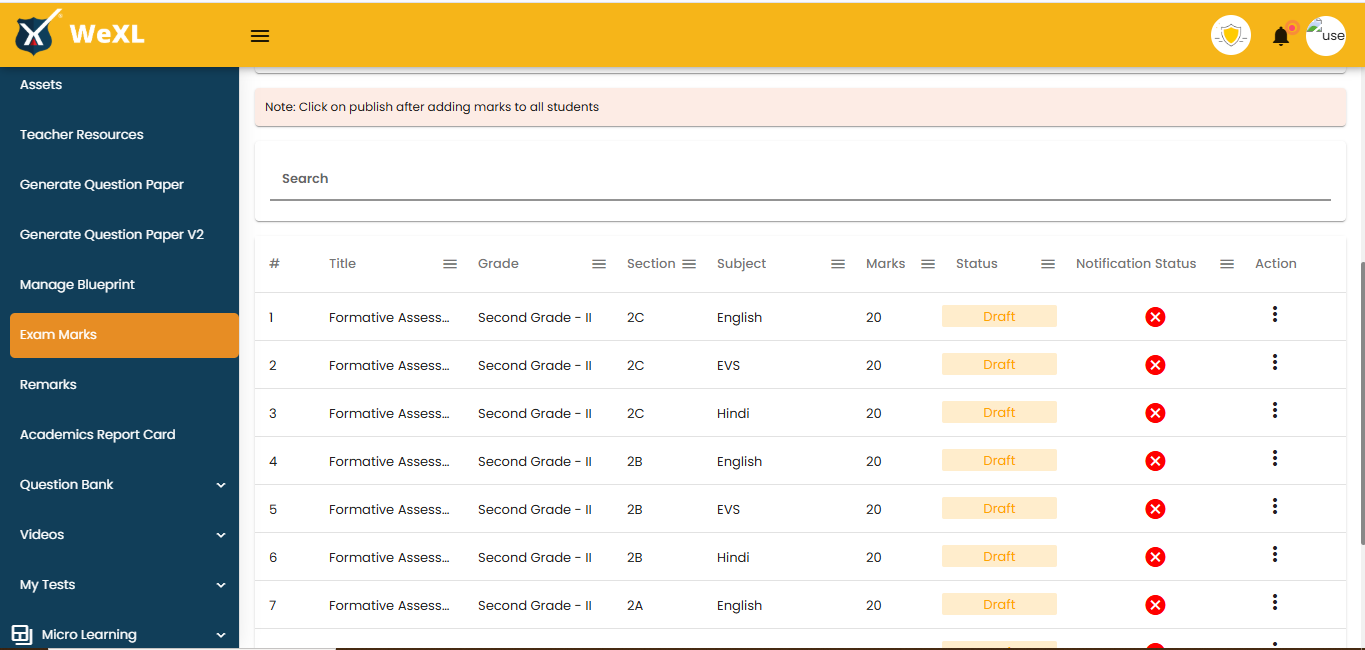
**Step 1: Navigate to Exam Marks**
* Go to **Academics > Exam Marks** in the **left menu**.
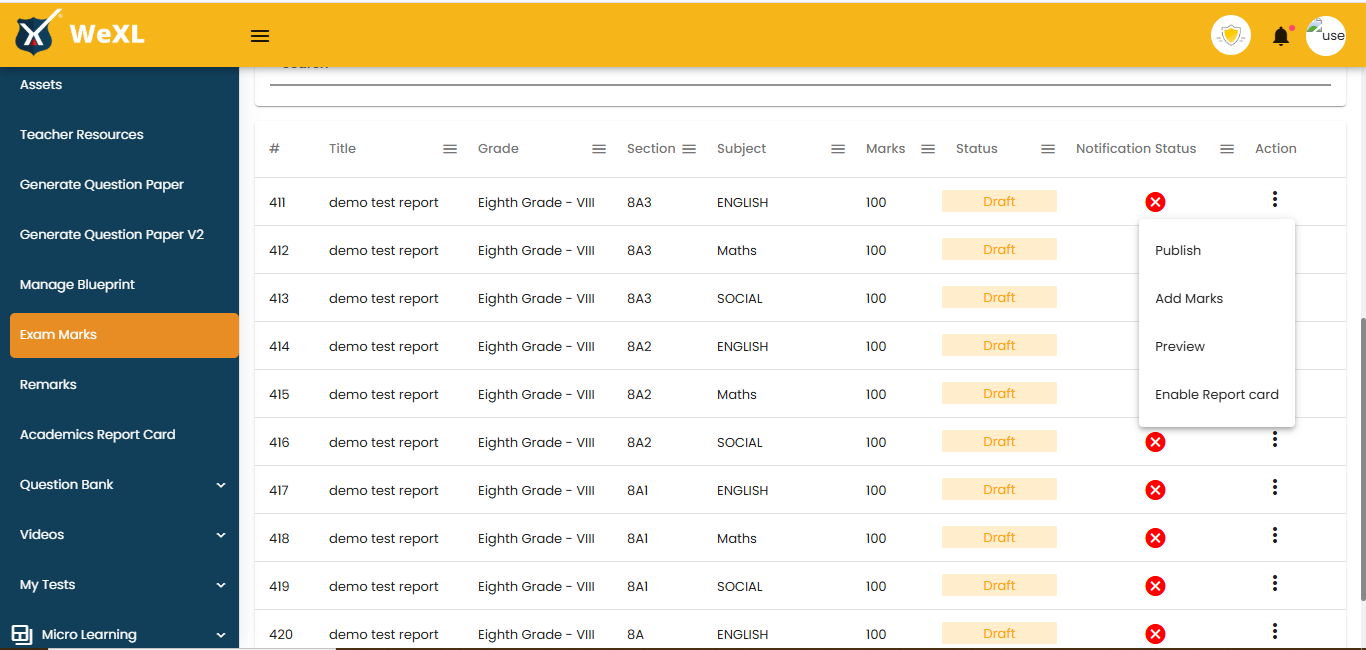
* Locate the exam and select **Add Marks** under **Actions**.
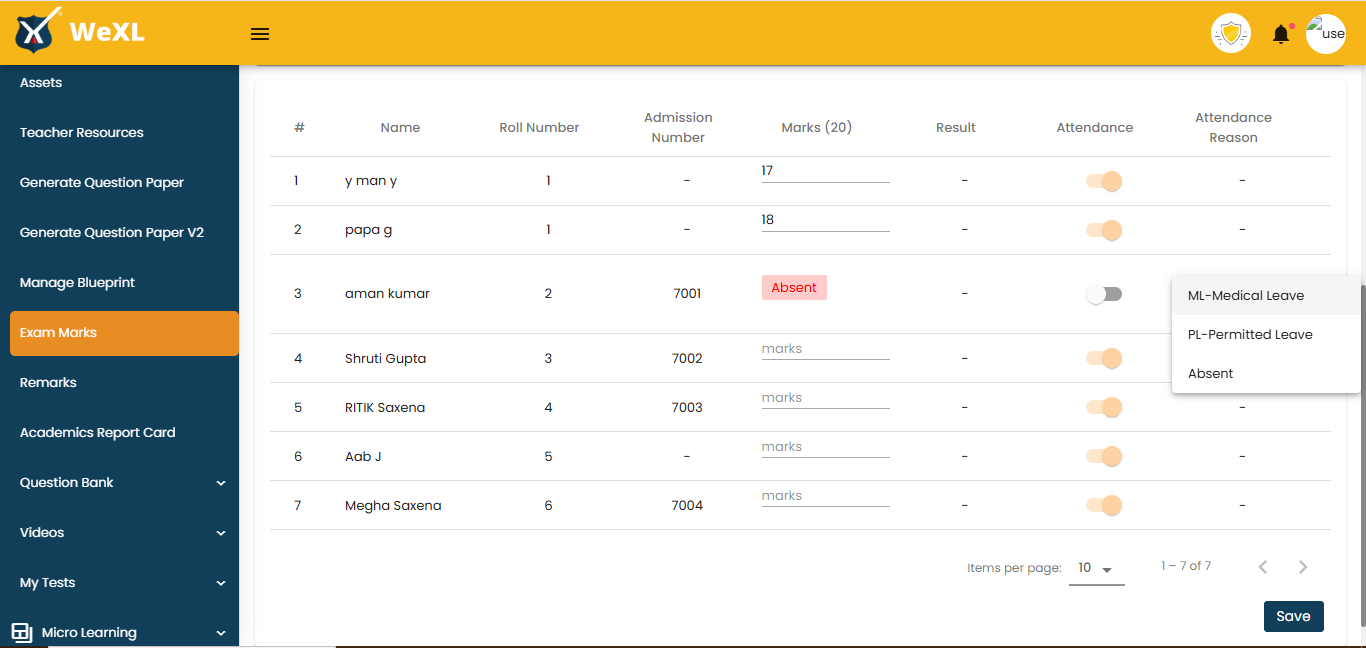
**Step 2: Enter Student Marks**
* Input marks for each student.
* If a student is absent, toggle the **Absent** button and provide a reason (e.g., Medical Leave).
* Click **Save** after entering all marks.
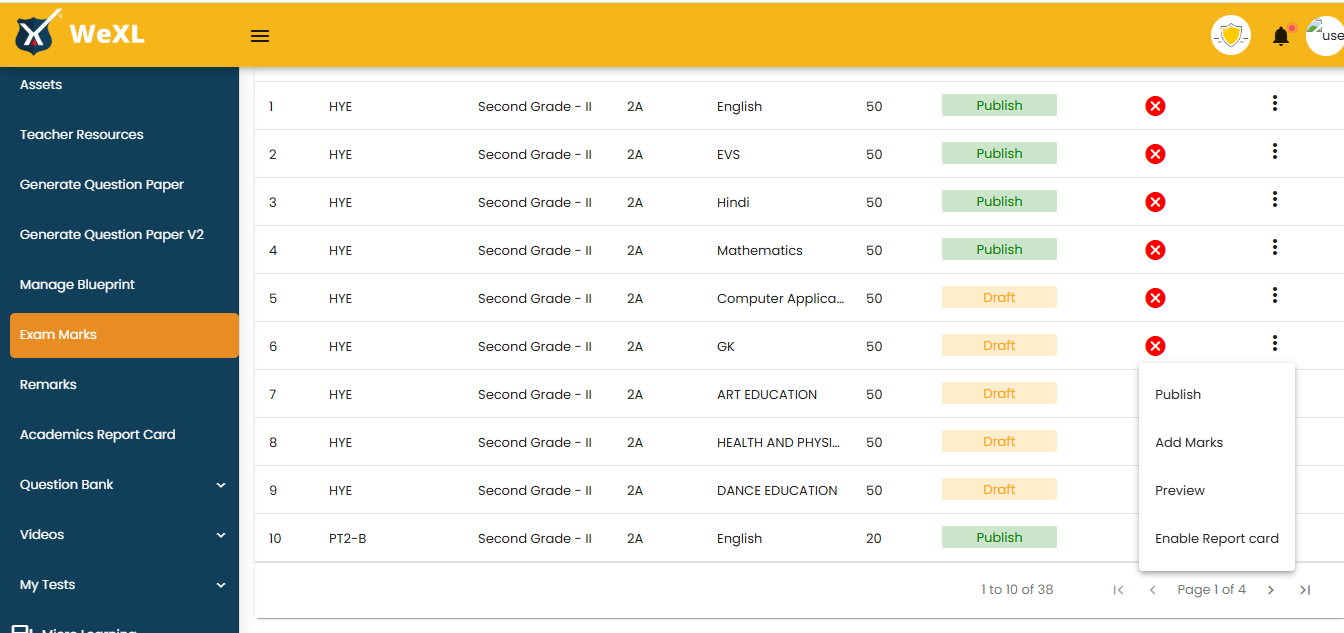
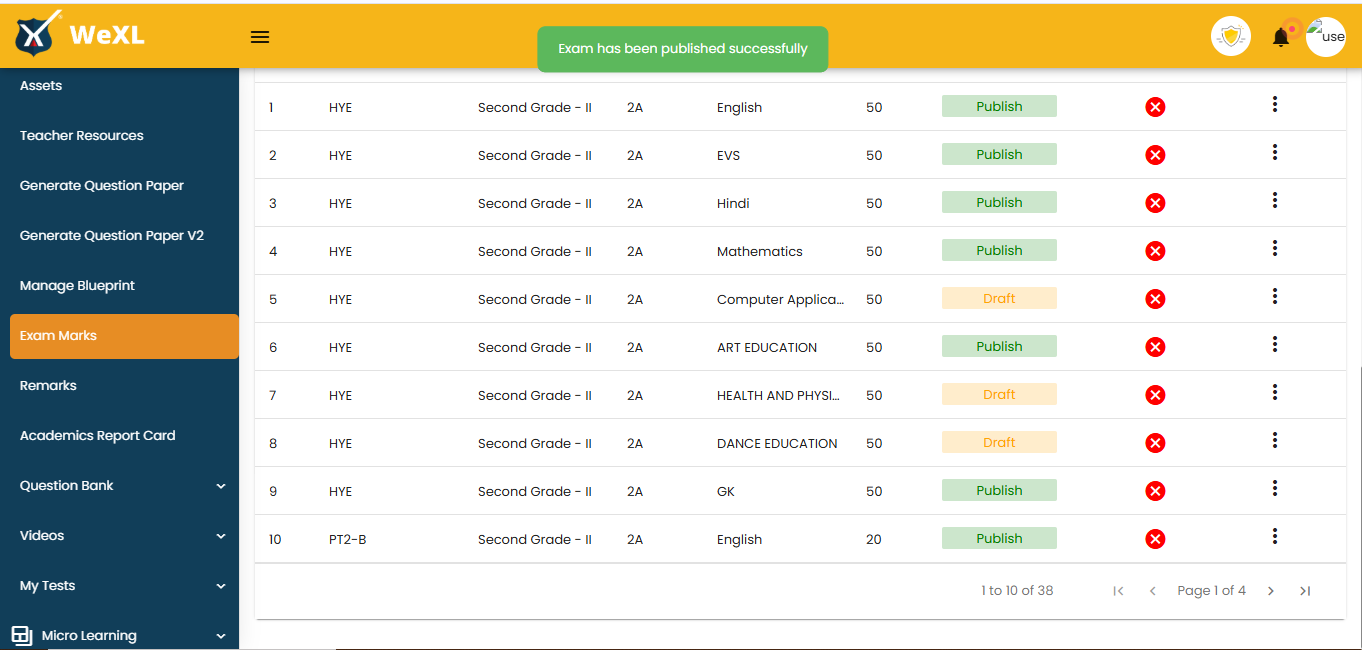
**Step 3: Publish the Marks**
* Go to the **Action** button and click **Publish**.
* Once published, the marks will reflect in the students’ report cards.
#### **Conclusion of Managing Exam Schedule**
The **Manage Exam Schedule** feature streamlines the process of organizing and conducting examinations efficiently. By automating exam scheduling, subject allocation, and mark entry, it minimizes manual effort and ensures **accuracy, transparency, and consistency** in student assessments.
**Key Benefits:**
* **Efficient Organization:** Helps administrators plan exams systematically, reducing scheduling conflicts.
* **Time-Saving Automation:** Eliminates the need for manual scheduling and mark entry, making the process faster and error-free.
* **Improved Accuracy:** Ensures correct exam dates, grading scales, and total marks for each subject.
* **Enhanced Student Tracking:** Facilitates performance tracking with automated result publishing and report card generation.
* **Attendance & Remark Integration:** Allows easy attendance marking and feedback inclusion in report cards.
By leveraging this feature, schools can maintain a **structured assessment process**, enabling better academic planning and student progress tracking.